Installation Guide
Unboxing
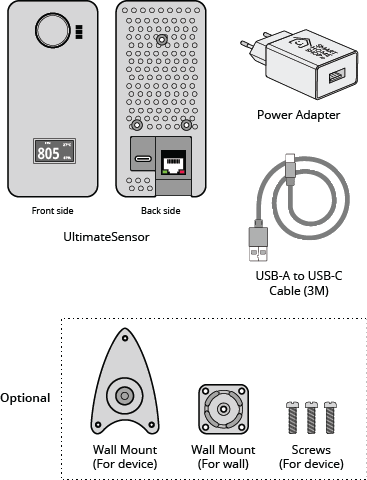
Unbox the UltimateSensor package and identify all the components. You should have the following items:
- UltimateSensor
Optional (if selected at checkout page):
- USB-C adapter set with a 3 meter cable (EU version, or universal version with US and UK plugs)
- Wall Mount for device screws
- Wall Mount (for device)
- Wall Mount (for wall)
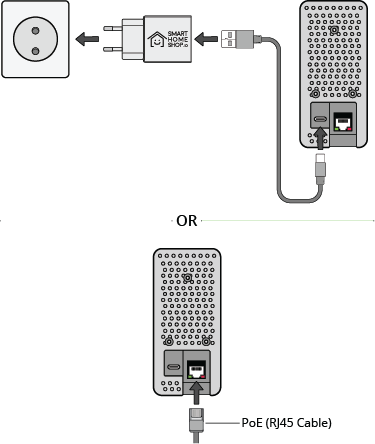
Step 1: Power by Cable -OR- PoE
Connect the UltimateSensor to a power source with a USB-C cable and a power adapter that provides at least 1A. If you selected the USB-C adapter set at checkout, use that set.
Please note that powering the device by PoE or using an Ethernet connection instead of WiFi only works if the device has the Ethernet firmware installed. All UltimateSensor versions support PoE if the Ethernet firmware is installed. To switch between the firmware versions, please visit the Firmware page.
Step 2: Connect to WiFi
Upon starting up the kit, the UltimateSensor emits a WiFi hotspot named 'ultimatesensor' with the password 'ultimatesensor'. Connect to this hotspot and the SmartHomeShop setup page opens. Pick your own WiFi network from the list or type its name, enter the password and select Save and connect. On this page you can also choose Ethernet or switch on SmartHomeShop Cloud. Firmware older than 1.12 shows a plain ESPHome WiFi page instead. Ensure that your WiFi network is a 2.4 GHz network. If the fallback hotspot does not appear, try using a different device. It may take up to one minute for the WiFi to become visible after powering on the device.
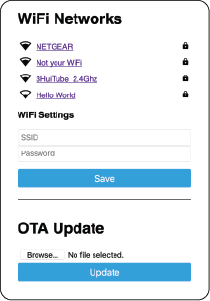
Note: When you connect to the fallback network, the web interface should open automatically. If that does not work, you can also navigate to http://192.168.4.1/ manually in your browser.
Step 3: Connect to Home Assistant
Once connected to your home WiFi network, Home Assistant will automatically detect the UltimateSensor under the 'Devices & Services' section. If this does not happen, you need to add the device manually. Look up the IP address of the UltimateSensor in your router, then go to Home Assistant settings -> Devices & Services. Click on Add Integration, select ESPHome, and enter the IP address of the device. It will then be added.
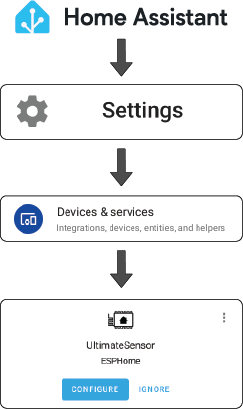
After connecting to Home Assistant, your device will be visible under Home Assistant -> Settings -> Devices & Services -> look for the ESPHome integration. Click on it to see your UltimateSensor with all its entities.
Step 4: Configure Device Sensors
Note that all sensors need at least 10 minutes to start up, and the CO2 sensor may take up to 24 hours or several days. The sensors may also need calibration; please refer to the calibration guide for instructions.
Placement Recommendations
For best performance, follow these placement guidelines:
- Mount at a height of 1-2 meters (3-6 feet) from the floor for optimal sensor readings
- Place on a cabinet or mount on a wall
- Avoid direct sunlight to prevent inaccurate measurements and reduce risk of sensor damage
- Ensure good air circulation around the device
Read more in our usage guide